How to Master Facebook Ads: A Step-by-Step Guide
This guide provides a comprehensive walkthrough of the entire process for creating and managing successful Meta ad campaigns, from initial setup to data-driven scaling. Learn the essential steps for configuring your assets, testing creatives, analyzing performance metrics, and making informed decisions to optimize your advertising efforts.

Sections
Foundational Setup: Preparing Your Meta Assets
Before launching any ads, a proper backend setup is essential for tracking, management, and brand presence. This involves creating and linking several core components within Meta's ecosystem to ensure campaigns run smoothly and data is collected accurately.
Create and Configure Your Facebook Page
Your Facebook Page acts as the public identity for your business and the source from which your ads will run. Start by navigating to the 'Pages' section on Facebook and selecting 'Create New Page'. Use your official store name for the Page Name and select an appropriate category, such as 'Shopping & Retail'. The bio can be a simple explanation of what your store offers. Complete the setup by adding your website URL, a profile picture (like your logo), and a cover photo. This page will be used for both paid advertising and organic community engagement.
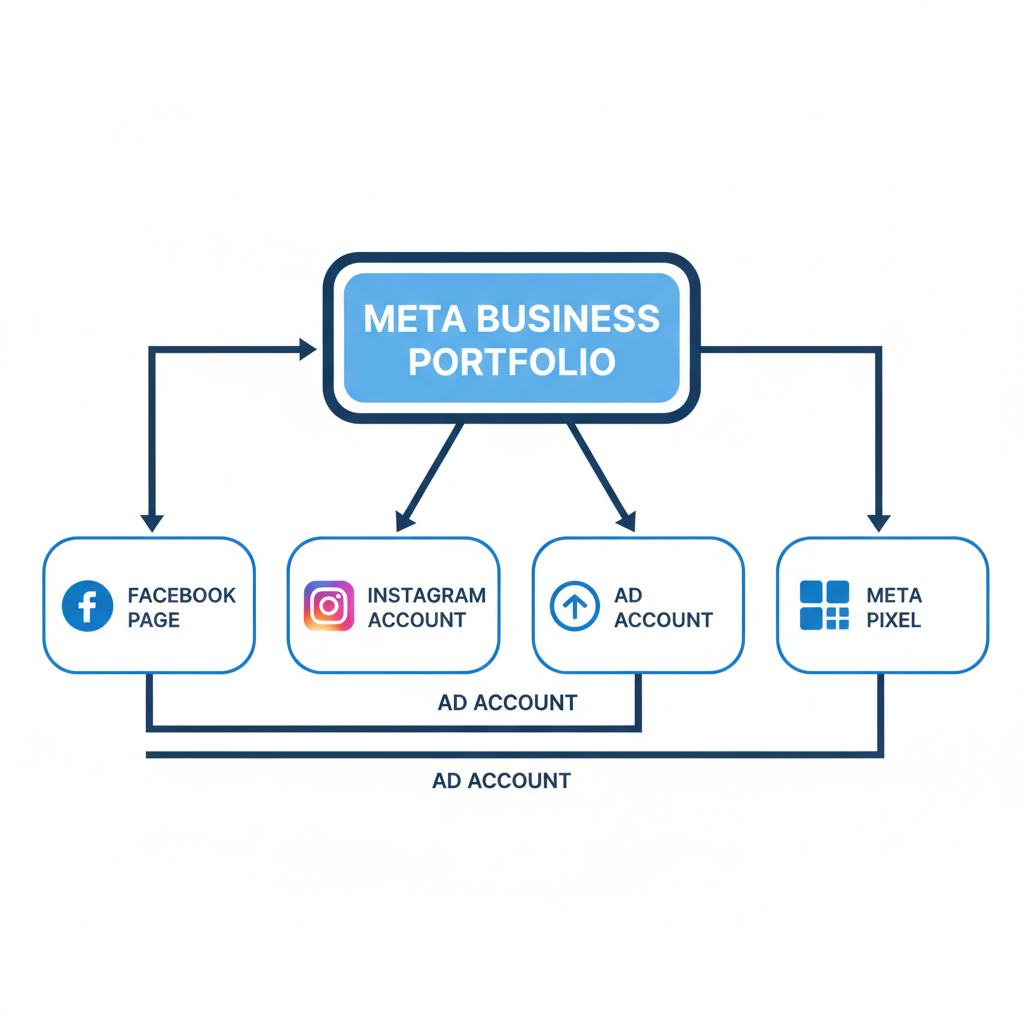
Set Up a Meta Business Portfolio
A Business Portfolio (formerly Business Manager) is a central hub for managing all your business assets, including your Page, ad accounts, and pixels. To create one, navigate to your Ads Manager and look for the option to 'Create a Business Portfolio'. Name the portfolio and provide your real name, as Meta may require identity verification. Once created, you will be prompted to connect your recently created Facebook Page to the portfolio.
Create Your Ad Account
Within your new Business Portfolio, you'll need to create an ad account. In the settings, find 'Ad Accounts' and select 'Create a new ad account'. Name the account—this is for internal use only. Crucially, ensure the time zone and currency are set correctly for your business operations, as these settings cannot be easily changed later. You will also be prompted to add a payment method, which is required before any ads can go live.
Install and Verify the Meta Pixel
The Meta Pixel is a piece of code that tracks visitor activity on your website, enabling conversion tracking and audience building. In your Business Portfolio's 'Data Sources' section, select 'Pixels' and create a new one. After naming it, assign it to your portfolio. To connect it to a platform like Shopify, use the Partner Integrations feature. Select Shopify, log in, and grant 'Maximum' permissions for comprehensive data tracking. Match the Pixel ID to ensure you're connecting the correct one. To activate the pixel, make your website public (remove any password pages) and simulate user behavior: visit your site, view a product, add it to the cart, and initiate checkout. This activity 'fires' the pixel events, turning its status from red (inactive) to green (active) in the Events Manager.
The Warm-Up Phase: Building Trust with Meta
A brand new ad account with no history is often seen as a risk by Meta's systems, which can lead to poor ad delivery, high costs, and potential flagging. A 'warm-up' campaign helps establish credibility and prepares the account for more significant spending.
Why New Ad Accounts Need a Warm-Up Period
Running a simple, low-budget campaign before launching major sales campaigns signals to Meta that you are a legitimate advertiser. This initial activity generates positive engagement signals, populates the pixel with initial data, and helps your account avoid the performance penalties often applied to new, inactive accounts. Skipping this step can result in an uphill battle from day one.
How to Set Up an Engagement Campaign
To warm up your account, create a new campaign with the 'Engagement' objective. In the ad set, set a modest daily budget (e.g., $10 per day) and target broad, Tier 1 countries (e.g., US, UK, CA, AU, NZ) with a general age range like 21+. For the ad itself, use a simple, eye-catching image and a short, welcoming caption. The goal is not to sell but to generate likes, comments, and page engagement. Let this campaign run for a few days to build a positive history before launching your primary sales campaigns.
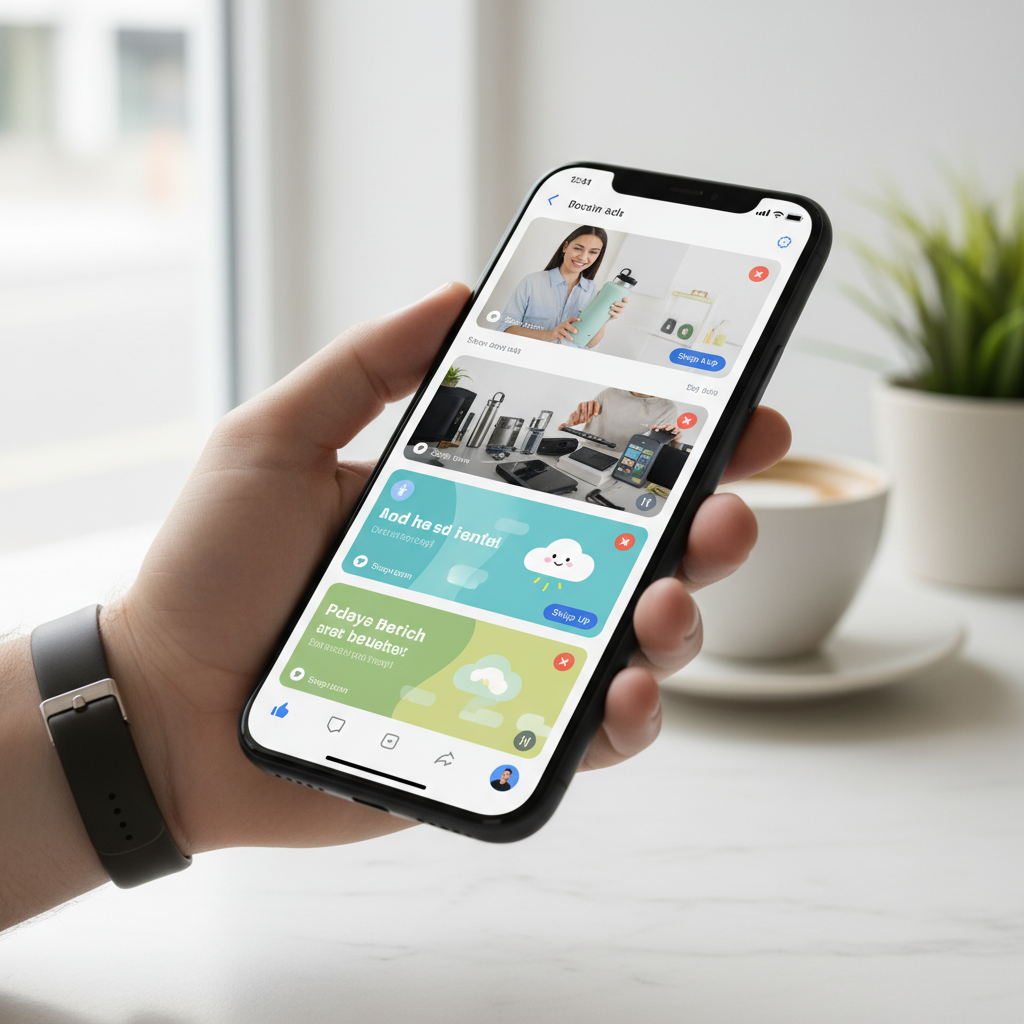
Creative Research: Finding Proven Ad Concepts
Effective advertising starts with understanding what already resonates with your target audience. Instead of guessing, research existing high-performing ads to identify proven angles, formats, and messaging.
Sourcing High-Engagement UGC on TikTok
Platforms like TikTok are valuable for finding user-generated content (UGC) that demonstrates organic demand. Search for your product or niche and look for videos with high engagement (likes, comments, shares). This type of raw, authentic content often connects better with audiences than polished brand ads. Analyze the video's hook, demonstration, and the user comments to understand what aspects are most compelling.
Analyzing Competitors in the Meta Ad Library
The Meta Ad Library allows you to see the active ads from any competitor on Facebook and Instagram. Search for brands in your niche to analyze their creative strategies. Pay attention to the videos and images they use, the primary text, headlines, and the offers they promote. Consistent angles or messaging used by multiple competitors often indicate a strategy that is performing well.
Developing Ad Copy Variations
Once you've identified a strong angle from your research, use it as inspiration to create multiple versions of your ad copy. Do not copy text verbatim. Instead, generate variations that explore different emotional triggers, such as solving a problem, offering convenience, or highlighting an emotional benefit. Having several distinct copy angles ready allows for more comprehensive testing.
The Creative Testing Campaign: Identifying Winning Ads
The goal of the first sales campaign is not immediate profitability but data collection. This phase is designed to systematically test your researched creatives and identify which ones have the potential to scale.
Campaign Settings: Sales Objective and CBO
Create a new campaign with the 'Sales' objective. Enable Advantage Campaign Budget (formerly CBO) and set a daily budget you are comfortable with for testing (e.g., $50). CBO allows Meta's algorithm to automatically allocate more of the budget to the best-performing ads within your campaign, accelerating the testing process.
Ad Set Configuration: Broad Targeting and Scheduling
Inside the ad set, set the conversion location to 'Website' and the performance goal to 'Maximize number of conversions', optimizing for the 'Purchase' event. To ensure clean data and stable budget delivery, schedule the campaign to start at midnight in your ad account's time zone. For a creative test, use broad targeting: select your primary countries, set an appropriate age range (e.g., 21+), and leave detailed targeting open. This isolates the creative as the primary variable being tested.
Ad Level Setup: Structuring Your Creatives for Testing
At the ad level, create a separate ad for each creative you plan to test (e.g., 5 total creatives = 5 ads within the one ad set). Ensure your Facebook Page and Instagram account are connected. The website URL for each ad should be the specific product page, not the homepage, to reduce friction. Upload your creative (image or video) and pair it with one of your copy variations. Use a compelling headline that highlights your main offer (e.g., '50% Off Today Only'). After setting up the first ad, use the duplicate feature to quickly create the others, swapping out only the creative and primary text for each version.
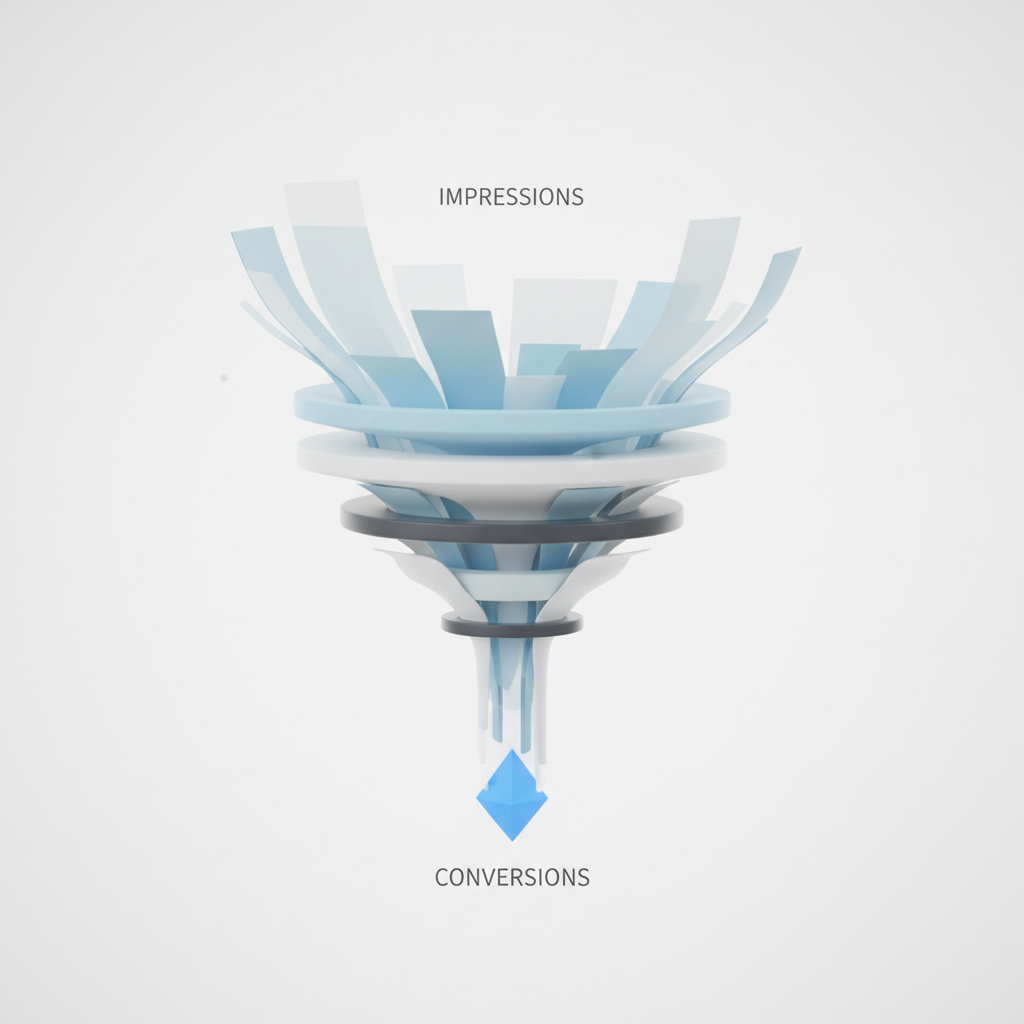
<img src="https://res.cloudinary.com/devmu4ctv/image/upload/v1768301742/ujuqhmxobhuiusvaycsu.png" alt="A clean analytics dashboard displaying key Facebook ad metrics like CTR and ROAS." loading="lazy">Data Analysis: Reading Your Campaign Metrics Correctly
Once your ads are running, the focus shifts from building to analyzing. Understanding key performance indicators (KPIs) is crucial for making objective decisions about which ads to stop and which to scale.
Understanding Front-End Metrics (CPM, CPC, CTR)
Front-end metrics measure user interaction with your ad before they visit your website.
- CPM (Cost Per 1,000 Impressions): Indicates how expensive it is to reach your audience. A high CPM suggests a competitive niche or ad creative that isn't resonating well.
- CPC (Cost Per Click): The average cost for any click on your ad.
- CTR (Click-Through Rate): The percentage of people who click your ad after seeing it. A higher CTR (e.g., 2%+) indicates your creative and copy are effective at stopping the scroll and grabbing attention.
Analyzing Back-End Metrics (Add to Cart, Purchase, ROAS)
Back-end metrics measure actions taken on your website after a user clicks your ad.
- Cost per Add to Cart (ATC): Shows how much you're spending to get a user to show high purchase intent. This is a strong indicator of product-market fit.
- Cost per Purchase: The ultimate measure of conversion cost. This is the amount spent to acquire a single customer.
- ROAS (Return On Ad Spend): Measures the total revenue generated for every dollar spent on advertising. A ROAS above your break-even point signifies profitability.
Using Break-Even Points for Decision-Making
Before analyzing, calculate your break-even ROAS and break-even cost per purchase. These numbers act as clear cut-off points. If an ad spends past its break-even cost per purchase without a sale, it should be turned off. This mathematical approach removes emotion from the decision-making process and protects your budget from underperforming ads.
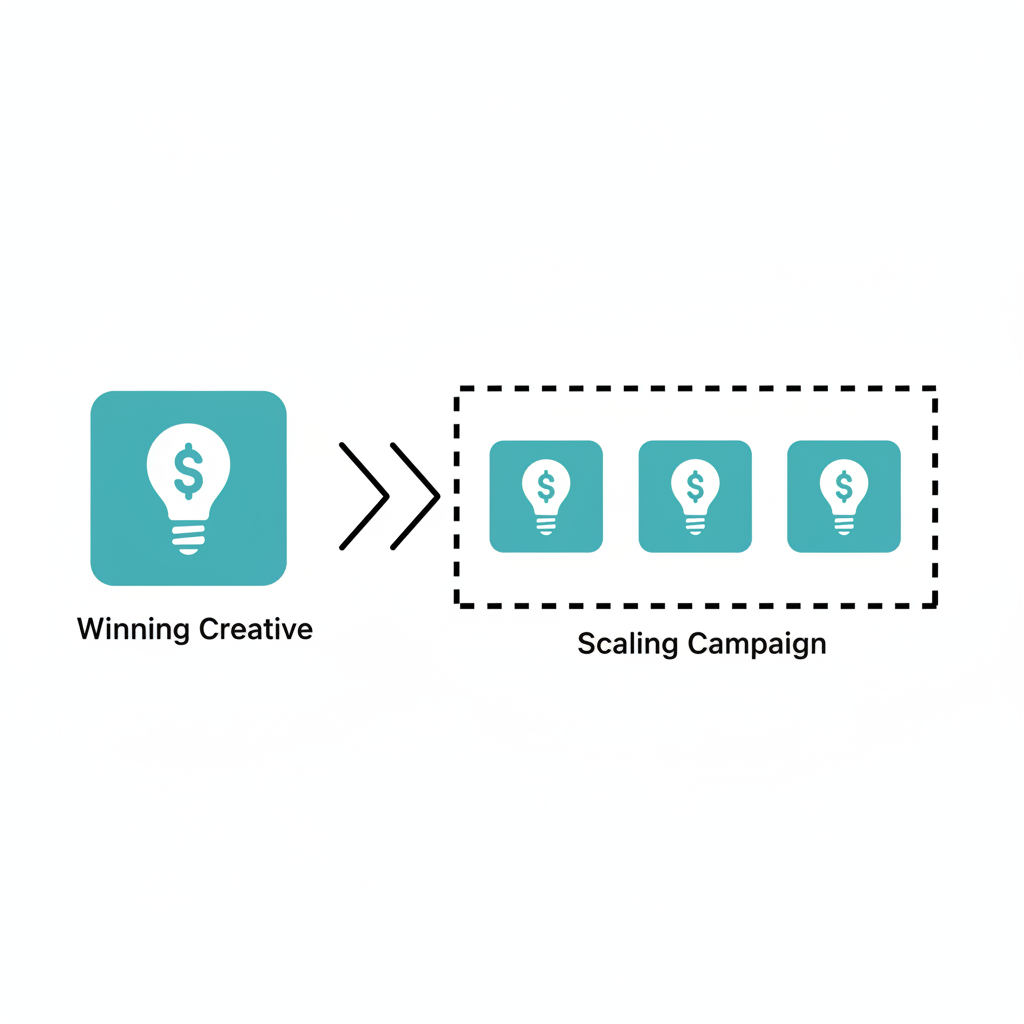
Scaling Your Winners: From Test to Growth
After your testing campaign has identified a clear winner—an ad that is generating purchases profitably—the next step is to scale it by carefully increasing its budget and reach.
Duplicating a Winning Ad into a New Campaign
Once an ad proves itself with consistent performance, do not simply increase the budget of the original testing campaign. Instead, duplicate the winning ad into a new CBO campaign. This preserves the original test data and allows the new scaling campaign to start fresh, optimized around the proven creative.
Structuring Your Scaling Campaign (Budget & Targeting)
For the new campaign, set a higher daily budget (e.g., $75-$100). You can continue with the same broad targeting used in the test. Alternatively, you can create separate ad sets for each of the top-performing countries identified during the test. For example, if you saw strong results from both the US and Canada, you could have one ad set targeting the US and a second ad set targeting Canada, all within the same CBO campaign.
Testing Variations (Thumbnails and Hooks)
Inside your scaling campaign, duplicate the winning ad multiple times. Keep the core video creative the same, but test different thumbnails for each duplicate. A different thumbnail can act as a new hook, attracting a different segment of the audience without changing the proven core message of the video. This allows you to scale while simultaneously introducing small variations to combat ad fatigue.
Common Mistakes to Avoid
Navigating Meta's ad platform can be complex. Avoiding these common errors can significantly improve your chances of success.
- Skipping the Account Warm-Up: Launching a high-budget sales campaign on a cold account often leads to delivery issues and higher costs.
- Over-Complicating Targeting: During a creative test, using narrow, layered targeting makes it impossible to know if results are due to the audience or the ad creative. Keep it broad initially.
- Ignoring Break-Even Metrics: Letting underperforming ads run based on 'gut feeling' instead of data is one of the fastest ways to lose money.
- Sending Traffic to the Homepage: Always direct ad traffic to the specific product page to minimize clicks and maximize conversion rates.
- Making Decisions Too Quickly: Allow campaigns at least 24-48 hours to gather enough data before turning ads off, unless they have clearly spent past a break-even threshold.
Related Tools
Frequently Asked Questions
How much should I spend on Facebook ads to start testing?
A common starting budget for a creative testing campaign is around $50 per day. This amount is generally sufficient to gather meaningful data within a few days without a significant financial commitment. Lower budgets can work but will result in slower data collection.
Why is my CPM (Cost Per 1,000 Impressions) so high?
A high CPM can be caused by several factors, including targeting a highly competitive audience, low ad creative quality, or negative feedback on your ads. Broadening your audience or improving your ad's engagement potential can often help lower CPM.
How long should I run a creative test before making decisions?
It is best practice to let a testing campaign run for at least 2-3 days to exit the initial 'learning phase' and gather stable data. However, you can turn off individual ads sooner if they have spent past your calculated break-even cost per purchase without converting.
What is the difference between broad targeting and detailed targeting?
Broad targeting involves setting basic demographic parameters like age, gender, and location, leaving the algorithm to find the best audience. Detailed targeting adds layers of interests, behaviors, and specific demographics, which narrows the audience. For creative testing, broad targeting is recommended to isolate the ad's performance.
Should I change the budget of a campaign while it's running?
Key Terms
- Meta Pixel
- A snippet of code placed on a website that tracks visitor actions (like page views, adds to cart, and purchases) and sends this data back to Meta for conversion tracking, optimization, and audience building.
- Business Portfolio
- A central tool within Meta for businesses to manage all their marketing and advertising assets, including Facebook Pages, Instagram accounts, ad accounts, pixels, and user permissions.
- CBO (Advantage Campaign Budget)
- A campaign-level budget setting where Meta automatically distributes the total budget across the ad sets and ads within the campaign, allocating more spend to the top performers.
- CPM (Cost Per Mille)
- The cost an advertiser pays for one thousand views or impressions of an advertisement. It's a common metric used to measure the cost-efficiency of an ad campaign.
- CTR (Click-Through Rate)
- The percentage of impressions that resulted in a click on your ad. It is calculated as (Total Clicks / Total Impressions) x 100 and is a key indicator of ad relevance and creative effectiveness.
- ROAS (Return On Ad Spend)
- A marketing metric that measures the amount of revenue earned for every dollar spent on advertising. It is calculated by dividing the total revenue from ads by the total ad spend.
- UGC (User-Generated Content)
- Any form of content, such as videos, images, or reviews, that has been created and shared by users rather than brands. It is often perceived as more authentic and trustworthy.